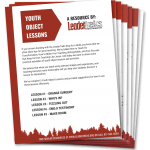
Youth Object Lessons: Five Illustrations
Tips for Including Great Illustrations in your Teaching
If you’ve been tracking with the LeaderTreks blog for a while, you know that we got our start leading Mission Trips and that we have a heart for helping youth workers become great teachers. We’ve talked How to Teach for Transformation, How to Make Your Teaching Unforgettable, and Four Excuses that Keep Us from Teaching Like Jesus. And today we want to share some practical examples of youth object lessons and activities.
We’ve compiled 5 Youth Object Lessons and provided suggestions for how to use these lessons effectively.
We believe that when you teach using relevant images and experiences, your teaching becomes more memorable and you help your students discover a lesson for themselves. You can find 5 more activities in our post “Youth Group Activities with a Message.”
Click here to download a PDF of this article.
Youth Object Lesson #1: Orange Surgery
This lesson comes from the Rescue Root in The Core One-Year Bible Study Curriculum.
Use this object lesson to help students discover their inability to fix the problem of their own sin and teach on God’s abundant grace.
What you’ll need: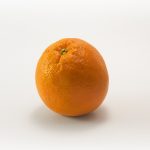
- An orange and paper plate for each student
- Various office supplies (thumb tacks, different kinds of tape, staplers, paper clips, string, rubber bands, glue, scissors, and anything else that might be helpful to “put the orange back together”)
- Wet wipes or paper towels for cleanup.
Instructions:
Say something like: Each of you has an orange that will be packed in the lunches of the second grade class. Instead of making the poor teacher peel all of them, we’d like you guys to take two minutes and peel all of the oranges and then pull apart the slices. You can leave the peels on the plate in one pile and the slices in another pile.
Pause and allow students to peel their oranges, while you set out the various office supplies.
Say something like: Sorry guys, there’s been a change of plans. I actually have a competition I want you to compete in. Here are the ground rules:
- No one can touch their plates or oranges until I say, “Go.” When I say, “Stop,” everyone must leave their orange as-is on their plate.
- You may use the supplies in this pile one at a time (e.g. If you are using the tape, you must return it before you can use a stapler).
- You may not move your workstation.
- At the end of five minutes, the person whose orange looks the most like it originally did wins. I’m the judge.
- Last, but not least, I am the game master, and I can make changes to rules as I see fit.
Discuss:
- Why isn’t the reconstructed orange as appealing to eat as the original?
- How much does your orange reflect the way it looked before you took it apart?
- Is there any way to take an orange apart and put it back together perfectly, exactly the way it was in the beginning? If so, what would you need to do it?
- Are there any similarities between the orange in front of you and the effects of sin on your life?
- Can anyone but God undo the effects of sin in our lives? How does he do that?
Teach:
God created this world and us in perfect harmony, designed to be connected with him forever. Sin ruined that and separated us from God. Nothing that we do has the power to restore God’s perfect harmony. On our own, we can’t put ourselves back together or make ourselves appear righteous before God (Ephesians 2:8-9). Yet our God had mercy on us and made a way for us to be counted righteous again, through Jesus dying on the cross. Connecting ourselves with him and following his leadership is the only way we can be in harmony with God again (Rom. 3:24, John. 3:16–19).
Youth Object Lesson #2: Who’s In?
This lesson comes from our Outcast Disciple Now Retreat Curriculum.
Use this object lesson to promote a healthy understanding of Christian community.
What you’ll need:
- pads of paper & pens for each group of 3-5 people
Instructions:
Say something like: Everyone should get into groups of 3-5, and each group should have a pen and a piece of paper. In your group try to come up with a list of five things that you all have in common (places you’ve visited, details about your families, etc.) The goal is to come up with a list that is unique to your group and no one else in the room.
Once the lists are made, each group reads out their experiences. If anyone else in the room has had that experience, the group who is reading marks it off their list. By the time the last list is read, the group with the highest number of unique experiences wins.
Discuss:
- Was it hard or easy to find common experiences with each other?
- Did the things other groups came up with surprise you?
- What did it feel like to be an insider or outsider, based on such random lists?
Teach:
Every one of us at some point feels like an outsider, like we just don’t fit in. But the fact is that as followers of Jesus, we all belong to the same family: the body of Christ, the church. Galatians 3:26–28 says, “For in Christ Jesus you are all sons of God, through faith. For as many of you as were baptized into Christ have put on Christ. There is neither Jew nor Greek, there is neither slave nor free, there is no male and female, for you are all one in Christ Jesus.” While we each come from very different backgrounds and cultures, we can still love one another and connect over the new family we get to create with Jesus.
Youth Object Lesson#3: Fizzling Out
This lesson comes from the Solo Jesus series in The Black Letters of Jesus One-Year Bible Study Curriculum.
Use this object lesson to help students think through how to strengthen their daily connection with God even in the midst of being busy.
What you’ll need:
- 2 clear plastic glasses
- water and Sprite (or any clear soda, diet or regular)
- 2 packets of Pop Rocks candy
- a stop watch (or stop watch app on a mobile device)
- pens and index cards
Instructions:
- Line up the plastic cups so everyone can see them.
- Fill each cup about 1/8 of the way with one of the three liquids, making sure there is an equal amount of liquid in each cup.
- Ask two students/group of students to be Cup Masters. They should “take charge” of a cup by standing/sitting in front of it, ready to act.
- Give each Cup Master a packet of Pop Rocks, but tell them not to open them yet.
- Make sure there are two Timekeepers with stopwatches, one for each cup.
- Ask all other students to be Observers. Give them index cards and pens to record what happens.
- When you say, “GO!” the Cup Masters will pour their packet of Pop Rocks into the cup in front of them.
- IMMEDIATELY have the Timekeepers begin to time the Pop Rocks “explosion.” They should call out intervals, like 30 seconds, 60 seconds, etc.
- Have the Observers make notes on how fast each cup is fizzing and which liquid seems to be affecting the Pop Rocks the most.
- After 3 minutes, compare the fizzing status of each Pop Rocks & liquid combo.
Discuss:
- Decide as a group which Pop Rocks & liquid combo had the smallest vs. biggest “explosion” and which combo took the shortest/longest time to fizzle out?
- When does your relationship with God seem to fizzle out fast, like the Pop Rocks & water combo?
- What things give your relationship with God the most staying power or strength, like the Pop Rocks & Sprite combo?
- How does having a strong connection with God (one that doesn’t fizzle out fast) help you face the busyness of life
- What is one change you can make this week to draw nearer to God?
Teach:
In life we will always have busyness. Jesus was very busy, yet he showed us a very important truth. In the midst of all the Go, Go, Go! Jesus pulled away to spend some time with God (Mark 1:29-35). Not so that he could just unplug and recuperate, but to make sure he actually stayed plugged into the real source of his strength in the midst of all the busyness.
Youth Object Lesson #4: Emoji Testimony
This lesson comes from the Project Serve Disciple Now Retreat Curriculum.
Use this object lesson to teach students the importance of sharing their personal stories of redemption.
What you’ll need:
- 2 Sheets of white paper for each student
- Markers or pens
- Students’ phones
Instructions:
Your challenge is to create an emoji testimony. Using only 10 emojis, tell your story in a way that you think others will understand.
- On your phone, pick the emojis you want and put them in the right order. If you or other students don’t have a phone, share.
- Then, using a marker or pen, draw the 10 emojis you chose on a white sheet of paper large enough so others can see.
- On your second sheet of paper, write out the story you told with your emojis. Try to keep this short, and don’t include anything people couldn’t get from only looking at your icons.
After everyone is finished, have a few students take turns sharing the emojis they drew with the rest of the group. Have other students try to guess the story based only on the emojis. Then have the sharing student read his or her story from the other sheet of paper to see how close the rest of the group got.
Discuss:
- How easy was it to tell your story using only emojis?
- If you were sharing your story with someone to introduce them to the good news of Jesus (probably not using emojies!), what would you want to be sure to include?
- How can sharing your faith story actually serve someone?
Teach:
One of the best ways to serve others is by sharing Jesus with them. But for many of us, that’s pretty intimidating. We don’t want to come across as pushy, and we’re worried people will be offended when we talk about our faith. One simple way to share Jesus with other people is by telling our own stories. We live in a culture where people love hearing stories. Other people will be way more likely to listen to you if you tell them about how Jesus has transformed your life in a personal way.
Youth Object Lesson #5: Make Room
This lesson comes from the Intersections One-Year Bible Study Curriculum.
Use this object lesson to help students identify what gets in the way of them making room for Christ in their hearts.
What you’ll need:
- Marker
- Clear plastic cups
- Straws
- Pancake syrup
- Cold water
- Paper towels
- Optional: large dish or towel per group to catch spills and wet-wipes/baby wipes.
Instructions:
PREPARE IN ADVANCE:
- Pour ~1 inch of water into a plastic cup. Pour ~1 inch of syrup into the bottom of a second cup (NOTE: if the cups have lines, you can use them as your guide).
- Draw a line on both cups to mark the starting level of the liquids.
- Slowly add more water on top of the syrup layer until it’s filled to the brim.
- You should end up with Cup 1 holding one inch of water and Cup 2 filled to the top with water with a one-inch layer of syrup sitting on the bottom.
- You’ll split your students up into groups of 4–6. Repeat this process, preparing enough cups for each group of students to have one set.
- Put the prepared cups, straws, and paper towels in center of each table.
- Put optional supplies (large dish or towel, wipes) on tables if you’re using them.
SAY SOMETHING LIKE:
- Each group has two cups of water. Cup 1 has just one inch of water in it. Cup 2 is filled to the top with water, but it also has layer of syrup on the bottom. The syrup is thicker and denser than the water, so it sinks to the bottom. They should stay separated for a while if you don’t mix them up. You’ve got some straws and paper towels that you’ll need to complete this challenge.
- Everyone wait until I say, “Go!” I’ll start a timer, and each group will have 2 minutes to get as much of the water from Cup 1 into Cup 2, even though it’s already filled to the brim. You can only add water from Cup 1 to Cup 2; you can’t remove any water from Cup 2. This might seem impossible, but if you work with the tools on your table, you can do it. Ready? Set? Go!
When time is up, have everyone put his or her cups down to let the liquids settle into layers again. Each group should see how much room they were able to make by comparing the current syrup level with line marking the starting level. The winning group is the one with the most water/least syrup in Cup 2.
FACILITATOR’S NOTE:
Because the syrup is stuck in the bottom of the cup, this will be almost impossible unless they first make room by getting rid of the syrup. It is possible to remove most of the syrup using the straws, but it will be messy and sticky, because the syrup will cling to every surface it touches.
Discuss:
- How did you make room in your cup for more water? What was the hardest part?
- Name some things that “fill your cup” on a daily basis (activities, school, relationships, the things you think about):
- Which of these things help you grow in your relationship with Christ?
- Which of these things would be the hardest for you to give up if you had to?
- Is there anything that needs to change to make sure these things in your life don’t become like the sticky syrup, taking up space that Christ could fill?
Teach:
It was really difficult to add more water to the cup that was already full without first getting rid of the syrup. Even if you were able to make room, that syrup was really clingy and made a big mess. It was impossible to get rid of all traces of syrup. In the same way, we can’t make more room in our hearts to pursue Jesus if we don’t get rid of other things first. And the more value we place on those things—the more we cling to them for security—the harder and messier it’ll be to get rid of them. But like it says in Luke 18:18-30: “What is impossible with man is possible with God.”
You can find 5 more activities in our post “Youth Group Activities with a Message.”
Click here to download a PDF of this article.

About the Author
Angie Franklin
Angie Franklin is the Director of Operations at LeaderTreks and has worked in youth ministry since 2000. She loves serving youth workers who are in the trenches by providing them with practical resources. She is a graduate of Moody Bible Institute and now lives in West Chicago, Illinois with her husband, Doug, and their dog,… Read More